
I absolutely adore this Flourless Chocolate Cake with Rich Chocolate Glaze Recipe because it brings together the deep, intense flavors of chocolate in such a luscious and satisfying way, yet it’s surprisingly simple to make. I love how it melts in your mouth, delivering a perfect balance of rich cocoa and buttery sweetness, all wrapped up in a velvety glaze that adds that extra wow factor. Whenever I want to share something truly special yet fuss-free, this cake is my go-to choice, and I know you’ll fall just as hard for it as I did.
Why You'll Love This Flourless Chocolate Cake with Rich Chocolate Glaze Recipe
What really excites me about this recipe is how decadent the flavor is without being overwhelming. The combination of semisweet chocolate and Dutch-process cocoa creates a deeply rich taste that perfectly satisfies any chocolate craving. The glaze, made from heavy cream and more chocolate, adds an irresistible silkiness that just elevates the entire cake. Honestly, it’s chocolate heaven in one dish, and yet it’s balanced enough that you won’t feel weighed down after a slice or two.
Another reason I love this recipe is its ease and straightforwardness. You don’t need fancy ingredients or complicated steps—just quality chocolate, eggs, butter, and a few pantry staples. The fact that it’s flourless makes it naturally gluten-free, which is a great bonus for anyone with dietary restrictions or just looking for a different texture than traditional cakes. Plus, it’s ideal for any occasion, whether it’s a weeknight treat, a celebration dessert, or a showstopping centerpiece at your next dinner party. Trust me, once you’ve baked this cake, you’ll want to make it again and again.
Ingredients You'll Need

The simplicity of the ingredients is what truly makes this Flourless Chocolate Cake with Rich Chocolate Glaze Recipe shine. Each component plays a vital role in building the cake’s texture, flavor, and moistness, so don’t worry about needing anything fancy or hard-to-find.
- 1 cup semisweet chocolate chips: These provide the core chocolate flavor; feel free to use milk or dark chocolate for a twist.
- ½ cup unsalted butter, room temperature: Adds richness and helps create the smooth texture I love.
- ¾ cup granulated sugar: Balances the bitterness of the cocoa with just the right amount of sweetness.
- ¼ teaspoon fine salt: Enhances the chocolate taste without being noticeable.
- 1 teaspoon vanilla extract: Adds warmth and depth to the chocolate flavor.
- 3 large eggs: Bind the ingredients and give the cake its dense, fudgy texture.
- ½ cup Dutch-process cocoa powder: Provides that rich, dark chocolate flavor that’s second to none (regular cocoa can work, but less intense).
- 1 cup semisweet chocolate chips (for glaze): For the glaze that seals in moisture and adds a glossy finish.
- ½ cup heavy cream (for glaze): Creates a smooth, creamy glaze that melts on your tongue.
Directions
Step 1: Preheat your oven to 375°F. Lightly grease an 8-inch metal round cake pan, then cut a piece of parchment paper to fit the bottom. Grease the parchment as well to prevent sticking—this is key for an easy release later.
Step 2: Place 1 cup of semisweet chocolate chips and the butter in a microwave-safe bowl. Heat in short bursts, stirring in between, until the butter is fully melted and the chocolate chips are soft. Transfer this smooth chocolate mixture into a mixing bowl.
Step 3: Stir in the sugar, salt, and vanilla extract into the chocolate-butter mixture. Then add the eggs one at a time, beating briefly after each addition until the batter is smooth and glossy.
Step 4: Sift in the Dutch-process cocoa powder and mix gently but thoroughly until just combined. Be careful not to overmix—this helps keep the texture right in that fudgy zone.
Step 5: Pour and spread the batter evenly into your prepared cake pan. Bake in the preheated oven for 25 to 28 minutes until a thin crust forms on top. The internal temperature should reach at least 200°F, which I check with an instant-read thermometer to be sure it’s perfectly set.
Step 6: Remove the cake from the oven and let it cool in the pan for about 5 minutes. Then run a knife around the edges to loosen it, invert the cake onto a serving plate—don’t worry about the top now being on the bottom, it will look beautiful once glazed.
Step 7: For the glaze, put the remaining 1 cup of semisweet chocolate chips in a heatproof bowl. Heat the heavy cream until it just starts to show bubbles around the edges but does not boil. Pour the hot cream over the chocolate and let it sit quietly for 5 minutes to soften the chips.
Step 8: Stir the glaze slowly at first, then with more vigor, until it becomes smooth and all chocolate has melted. If you see any lumps, gently reheat the mixture briefly either in short microwave bursts or over a double boiler, then stir again.
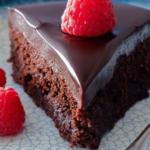
Step 9: Spoon the rich chocolate glaze over the cooled cake, letting it drip naturally down the sides. Allow the glaze to set completely for several hours before slicing with a sharp knife. I like to serve it with fresh raspberries, a scoop of vanilla ice cream, or a dollop of whipped cream for that perfect finishing touch.
Servings and Timing
This Flourless Chocolate Cake with Rich Chocolate Glaze Recipe makes about 12 generous servings, which is perfect for sharing with family and friends. Prep time takes about 15 minutes, while the baking time is around 25 to 28 minutes. Don’t forget to allow at least 30 minutes for cooling and several hours for the glaze to set fully, so in total, you’ll want to plan for about 1 hour to 1 hour and 15 minutes. It’s definitely worth the wait!
How to Serve This Flourless Chocolate Cake with Rich Chocolate Glaze Recipe

When it comes to serving this cake, the possibilities delight me. I often like to pair it with fresh fruit like raspberries or strawberries, which complement the rich chocolate beautifully with a burst of tartness. A scoop of creamy vanilla ice cream or a dollop of lightly whipped cream adds a contrast in texture and temperature that’s so satisfying. You can even sprinkle a bit of sea salt on top of the glaze for a trendy, savory twist that highlights the chocolate’s depth.
I find this cake shines best at room temperature to let all the layers of flavor come forward. If it’s too cold, the glaze firms up and the cake feels denser—still delicious, but I love it a little softer. Presentation-wise, cutting it into modest, thin slices keeps portions just right since the cake is quite rich and fudgy. For parties or special occasions, it looks stunning served on a simple white plate with a few fresh mint leaves for color.
For beverages, I like pairing this cake with a rich red wine such as a Cabernet Sauvignon or a fruity Pinot Noir to enhance the chocolate’s complexity. For non-alcoholic options, a strong cup of coffee or a creamy chai latte balances the sweetness wonderfully. I’ve also served it at casual family dinners and festive holidays alike, and it never fails to impress or disappear quickly!
Variations
If you want to customize this Flourless Chocolate Cake with Rich Chocolate Glaze Recipe, there are plenty of fun directions to explore. I’ve swapped semisweet chocolate for dark chocolate to give the cake a more intense, bittersweet profile, which is fabulous for serious chocolate lovers. If you prefer milk chocolate, that works beautifully too for a sweeter, creamier feel. For the cocoa powder, Dutch-process is my favorite for richness, but natural cocoa can be used in a pinch with a slightly different but still delicious taste.
For those with dietary considerations, this cake is naturally gluten-free since it contains no flour, which is a huge plus. To make it vegan, I’ve experimented with egg replacers and dairy-free butter alternatives, though the texture changes to a slightly less dense, more mousse-like cake. You could also try a coconut cream glaze instead of the traditional heavy cream version for a tropical twist.
Cooking methods-wise, while I’ve only baked this cake traditionally, I imagine it could also work in a water bath for even more fudgy, moist results, similar to a cheesecake texture. You might need to adjust baking times slightly for that. Another idea I cherish is adding a pinch of espresso powder to the batter, which subtly amplifies the chocolate flavor without lending a coffee taste—just a little secret weapon.
Storage and Reheating
Storing Leftovers
Once you have leftovers of this cake (if there are any!), the best way to store it is in an airtight container or loosely covered with plastic wrap to prevent it from drying out. I keep mine in the refrigerator to preserve the rich glaze and maintain freshness, and it stays great for up to 4 days. Just make sure your container is not too tight around the glaze to avoid smudging the beautiful top.
Freezing
This cake freezes very well, which is fantastic if you want to prepare ahead or save some for later indulgence. I recommend wrapping the cake tightly in plastic wrap and then placing it inside a resealable freezer bag or an airtight container. It’s best to freeze it unglazed and add the glaze after thawing for the freshest texture, but you can freeze it glazed if necessary. The cake can keep in the freezer for up to 3 months.
Reheating
When you’re ready to enjoy your leftover cake, I suggest thawing it overnight in the refrigerator. You can bring it close to room temperature before serving by leaving it out for about 30 minutes. If you want to gently warm a slice, a few seconds in the microwave (around 10-15 seconds) can help soften it without melting the glaze too much. Avoid reheating for too long as it might change the texture or cause the glaze to become runny.
FAQs
Can I use regular cocoa powder instead of Dutch-process?
Yes, you can substitute regular cocoa powder, but the flavor will be slightly less rich and less smooth compared to Dutch-process. To compensate, you might want to add a pinch of baking soda to balance acidity or choose a higher quality natural cocoa.
Is this cake gluten-free?
Absolutely! Since this cake contains no flour, it’s naturally gluten-free, making it a great option for guests with gluten sensitivities or those avoiding gluten entirely.
Can I make this cake ahead of time?
Definitely. This cake actually benefits from some resting time, especially allowing the glaze to set fully. You can bake the cake a day ahead, glaze it, and keep it covered in the refrigerator until you’re ready to serve.
What if I don’t have an instant-read thermometer?
No worries! You can check doneness by gently touching the top; it should have a thin crust and feel set without wobbling. A toothpick inserted into the center may come out with moist crumbs but not wet batter.
Can I add nuts or other mix-ins?
While traditional recipes keep it simple, I love adding chopped toasted nuts like hazelnuts or almonds for some crunch. You could also swirl in raspberry jam before baking for a fruity surprise, just be mindful that any additions might change the cake’s texture slightly.
Conclusion
I can’t recommend this Flourless Chocolate Cake with Rich Chocolate Glaze Recipe highly enough—it’s truly one of those desserts that feels both indulgent and approachable. Every time I bake it, I’m reminded why it’s a favorite in my kitchen: irresistible chocolate flavor, beautiful texture, and a finish that’s nothing short of stunning. I hope you’ll give it a try, and I’m sure once you do, it’ll become a treasured recipe in your collection just like it is in mine.
Print
Flourless Chocolate Cake with Rich Chocolate Glaze Recipe
- Prep Time: 20 minutes
- Cook Time: 28 minutes
- Total Time: 1 hour 10 minutes
- Yield: 12 servings
- Category: Dessert
- Method: Baking
- Cuisine: American
- Diet: Gluten Free
Description
This Flourless Chocolate Cake is a rich, decadent dessert that combines the intense flavor of semisweet chocolate with a smooth, velvety texture. Made without any flour, it’s perfect for those seeking a gluten-free indulgence. The cake is topped with a luscious chocolate glaze that hardens to a shiny finish, making it an elegant choice for special occasions or a luxurious treat any time.
Ingredients
Cake
- 1 cup semisweet chocolate chips (you can also use milk chocolate or dark chocolate)
- ½ cup unsalted butter, room temperature
- ¾ cup granulated sugar
- ¼ teaspoon fine salt
- 1 teaspoon vanilla extract
- 3 large eggs
- ½ cup Dutch-process cocoa powder (regular cocoa can be used but will be less rich)
Glaze
- 1 cup semisweet chocolate chips
- ½ cup heavy cream
Instructions
- Prepare the pan: Preheat the oven to 375°F. Lightly grease a metal 8-inch round cake pan. Cut a piece of parchment paper to fit the bottom, grease it as well, and place it in the pan to prevent sticking.
- Melt chocolate and butter: Combine the chocolate chips and butter in a microwave-safe bowl. Heat in short intervals, stirring intermittently until the butter is fully melted and the chocolate chips have softened, taking care not to burn the mixture. Transfer this melted chocolate mixture to a mixing bowl.
- Mix cake batter: Stir in the granulated sugar, salt, and vanilla extract into the chocolate mixture. Add the eggs one at a time, beating briefly after each to make the batter smooth. Sift in the Dutch-process cocoa powder and gently mix just until combined, ensuring not to overmix.
- Bake the cake: Pour the batter evenly into the prepared cake pan. Place in the oven and bake for 25 to 28 minutes. The top should form a thin crust and an instant-read thermometer inserted in the center should reach at least 200°F to ensure doneness.
- Cool slightly: Remove the cake from the oven and let it cool in the pan for about 5 minutes, allowing it to set a bit for easier removal.
- Unmold the cake: Run a table knife around the edges to loosen the cake and invert it onto a serving plate. Note that the top will now be on the bottom, which is expected. Let the cake cool completely to room temperature before glazing.
- Prepare the glaze: Place the remaining chocolate chips in a heatproof bowl. Heat the heavy cream just until small bubbles appear around the sides, but do not bring it to a full simmer. Pour the hot cream over the chocolate and stir briefly. Let the mixture sit for 5 minutes to soften the chocolate, then stir slowly at first, gradually increasing stirring speed until the glaze is smooth and fully melted. If needed, gently reheat to smooth out any lumps.
- Glaze the cake: Spoon the glaze over the cooled cake, spreading it to cover the top and allowing some to drip over the sides for an appealing finish. Let the glaze set for several hours at room temperature or in the refrigerator before serving to achieve a glossy, firm coating.
- Serve: Use a sharp knife to cut the cake into 12 servings. This rich dessert pairs beautifully with fresh raspberries, vanilla ice cream, or a dollop of whipped cream for added indulgence.
Notes
- For best flavor, use Dutch-process cocoa powder, but natural cocoa powder can be substituted with slight changes in taste and texture.
- Ensure the chocolate and butter mixture is smooth and lump-free before mixing with eggs to avoid a grainy texture.
- The cake is delicate; handle carefully when inverting from the pan.
- Allow the glaze to set completely before slicing to maintain clean edges.
- This cake is naturally gluten-free due to the absence of flour, but confirm all ingredients if serving those with celiac disease.
- Store any leftovers covered in the refrigerator for up to 3 days. Bring to room temperature before serving.


Leave a Reply